For people who dislike dough.
For people who are afraid of dough.
For people who don’t know where to start in their bread making journey.
There are several ways to make yeasted dough, direct fermentation and indirect fermentation. Fermentation, making food taste better since the beginning of time through the process of converting sugars to carbon dioxide and alcohol (or lactic acid depending on what and how you’re fermenting). But, this post is all about yeasted doughs and how flour and water join together to make bread. My favorite is using the poolish method, a type of indirect fermentation that will give you the flavor, texture and aroma of pizzeria quality dough. It takes a little planning but it is a forgiving method that is especially great for a beginner bread maker.
Direct Fermentation
Adding yeast directly to flour and water, is direct fermentation. An example would be a soft sandwich loaf or milk bread will usually use a direct fermentation method. The process usually takes about 3-4 hours from initial ferment (first rise) to shaping and baking. This recipe from King Arthur Baking for Back-Bag-Oatmeal-Bread is one of my favorite direct ferment, minimal kneading breads.
Indirect Fermentation
Sourdough is the most recent and popular example of indirect fermentation, using a preferment, the sourdough starter, aka levain.
What did you name your sourdough starter? Bread Pitt? Clint Yeastwood? Something more original? Or did you throw your hands up and say, I just can’t and forgot all about making bread at home?
Other than anxiously nursing a sourdough starter for 7 days to 2 weeks prior to using it, there is also the issue of sourdough discard. Discard is the portion of the sourdough starter that is discarded before fresh flour and water is added to feed the starter. There are just just many discard cookies, cakes and pancakes that you can eat before you enter a gluten coma.
But, you’re stubborn and still want bread at home! You want to dazzle your family with a crispy, airy chewy pizza crust! I have an easy, delicious and honestly perfect solution for you.
Preferment! There are 5 types of preferment:
Levain ( sourdough starter) allows naturally occurring yeast and good bacteria to develop in a mixture of flour and water (sometimes with the addition of grapes). Creating the starter can take from 7 days to 2 weeks until complete for use in baking bread. Multiple feedings of fresh flour and water are required. The ferment needs to be monitored often and adjustments made depending on status of the levain.
Pâte Fermentée a piece of dough from the previous bread batch used in the next round of breadbaking. This can take up to 8-16 hours to ferment before shaping and baking occurs. Traditional Baguette uses this method.
Sponge the quickest of preferment techniques, allowing all of the baking yeast to buddy up with a part of the water and flour prior to forming the dough. Total time of preferment: 30-45 minutes. Typically used in making enriched dough like Ukrainian Easter Paska bread, challah, brioche and panettone.
Biga found in most Italian style bread, is a thick mixture of water, flour and a small amount of yeast allowed to ferment for at least a full day. This is used as a the base for the remainder of the dough.
Poolish Equal parts water and flour with a small sprinkling of yeast. The mixture can ferment up 18 hours at room temperature or for a day or three refrigerated. This is my preferred method for pizza dough and for occasions when I want a solid bready rustic bread with minimal kneading, good crust and sturdy crumb with nice air pockets.
You want this method because it preps the dough for you, the yeast, water and flour slowly ferment to develop flavor and gluten. The solution to less kneading is letting your dough be lazy.
Note: I do not weigh flour or water or salt or any ingredients for baking, If you’re here for science and math, this is not the place. I believe that most things in the kitchen should be 50% based in time tested kitchen fact. The remaining 50%, is intuition that comes only through practice and enjoyment in the process of cooking, which for me is removed entirely, if I have to start weighing and counting precise numbers. Yes, baking is a science but you’d be surprised how forgiving and flexible some recipes and techniques can be!
There will be more than one occasion when you bread just doesn’t happen. This is a reality for professional bakers too, so don’t take it to heart. Bread dough is one of the few living foods we make in our kitchen and all living things have not so stellar days. Here at the wonky stove we absolutely understand and encourage moving through all the not so amazing experiences in life and in the kitchen.
Poolish Dough
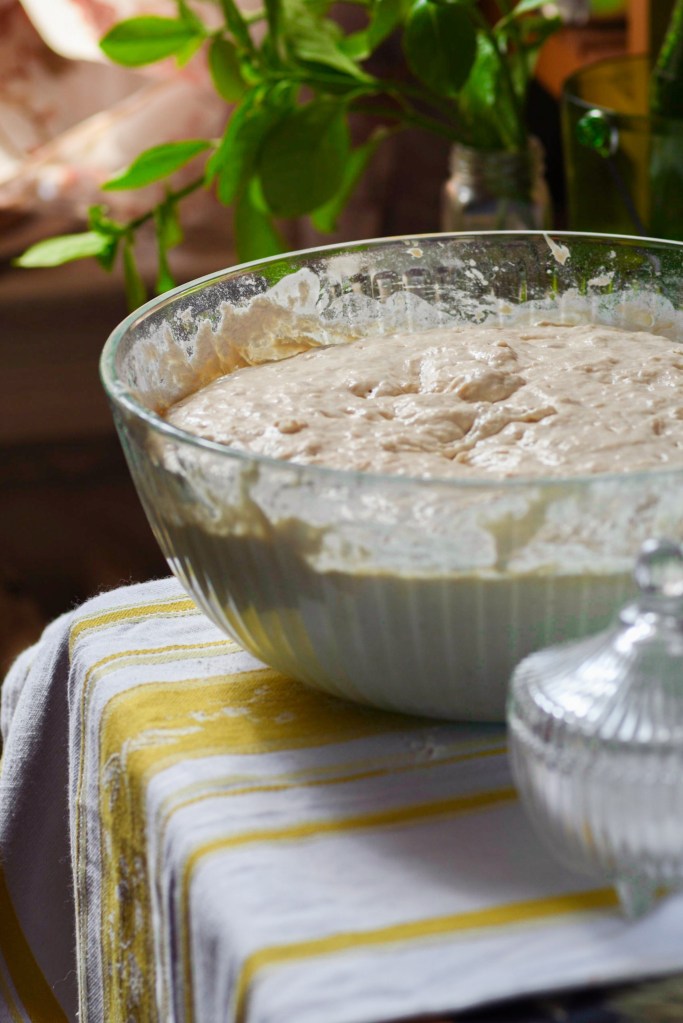
In a bowl larger than you think you need: combine about equal parts water and flour. The mixture should be between a thick soup and pancake batter.
2 cups water
1 1/4 cups flour, scooped and leveled
.5 tsp dry yeast
Stir to combine, cover with a cotton tea towel and place in a warm (but not hot) shaded area. Allow to sit on your counter overnight or at minimum 8 hours. Check on your starter a few hours in, if it is frothy and bubbly, you’re doing well, if it slightly frothy and has a small layer of liquid floating on top, add 1/2 cup flour and stir, your preferment was hungry and needed some more flour to power the yeast magic.
I planned to use my poolish but life happened?
Plop it, covered with plastic film into the refrigerator, it will be fine to use the within the next few days, up to 3 days depending on the starter, your refrigerator and the overall climate of where you live. What to look for? Make sure the bubbles are still bubbly. In most actuality your poolish may blob over your bowl, make sure your bowl is larger than you actually think it should be! Another tip is to place your bowl over a baking sheet before placing it in your refrigerator, to help contain messes that may occur during fermentation.
Ready for Pizza!
Using the poolish
To the mixture add
2.5 cups flour
1/3 cup water (room temperature)
1 tsp dry yeast
1 tbsp kosher salt
Stir to combine, a rubber spatula works best. You’ll notice that the poolish mixture that was more like a thick pancake batter has some spring in it, and will be sticky when mixing in the fresh flour, water and additional yeast. This mixture will still be wet. Head over to my Instagram to see video detail references on texture and kneading @thewonkystove
Cover and allow to rest for 35minutes.
Onto a floured surface plop the dough mixture and sprinkle 1/2 cup flour over the dough to start kneading. It will be sticky but will fairly quickly form into a ball. Slowly add flour if your hands begin to stick. Knead dough for about 5-10 minutes until a uniform ball is formed. Divide the ball into 4 pieces. Quickly knead and roll into 4 balls and set on a floured surface to rise, covered with a cotton tea towel for another 35 minutes.
Notes: the dough may still be tacky to the touch, especially after being divided, that is alright. it will hydrate after resting and be much more manageable. To manage the dough sprinkle a little flour on your hands and kneading surface.
Preheat your oven to 425F
Line a baking tray with parchment paper.
I don’t follow many “musts” in the kitchen but this one is important, use a wide shallow baking pan or shallow baking sheet. this will keep your dough from steaming and give you a nice even crust and bake on your pizza. Ideally invest in a set of aluminum baking pans, my two favorites have been a pair of 18×26 aluminum Nordic Ware sheet pans and a nonstick cake pan with lid from Faberware, both have been working hard in my kitchen for the past 15 years. They have become a but more pricey over the years, especially with the current aluminum shortage but they are going to outperform the flimsy single use foil pans as well as cost less in the long run. Keep and eye out for Amazon deals, promotions/holiday sales on the Nordicware webpage, group your Kohl’s cash and discount, etc. You’ll find a way !
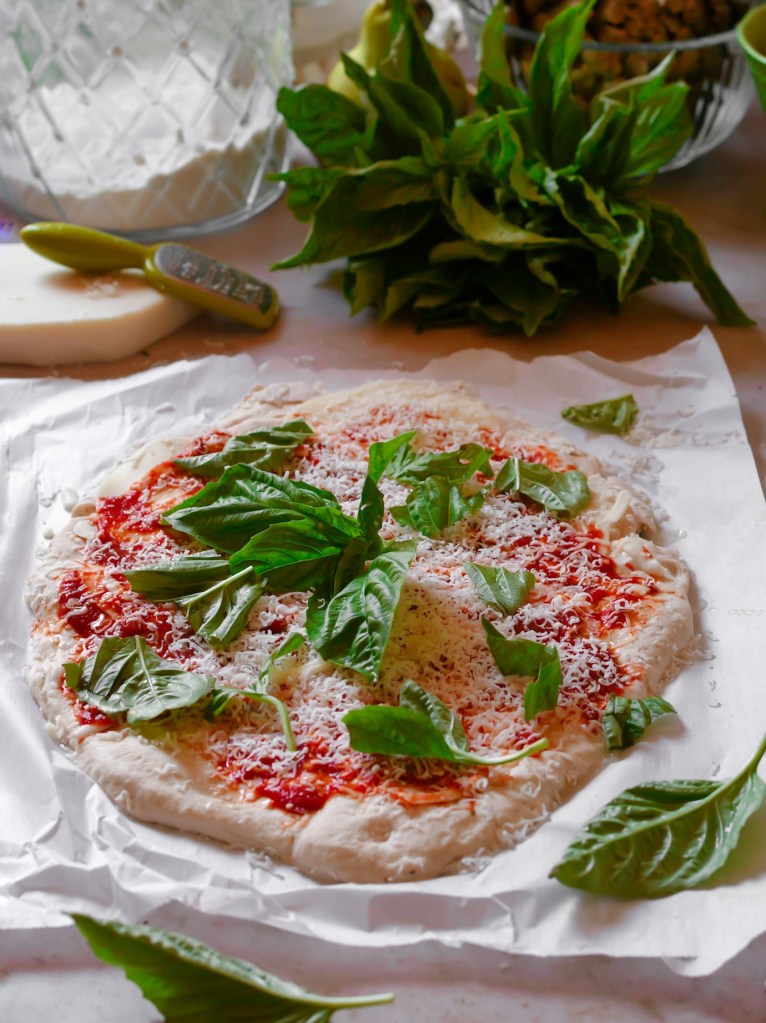
On to a parchment lined baking sheet , smooth out with oiled fingers a single ball of dough into a pizza round.
Shingle slices of provolone cheese first
Smooth a layer of tomato sauce over the cheese
Optionally add a sprinkling of fresh oregano, red pepper flakes and garlic
Top sauce with 1/3 cup grated parmesan cheese
Drizzle with oil and top with torn fresh basil
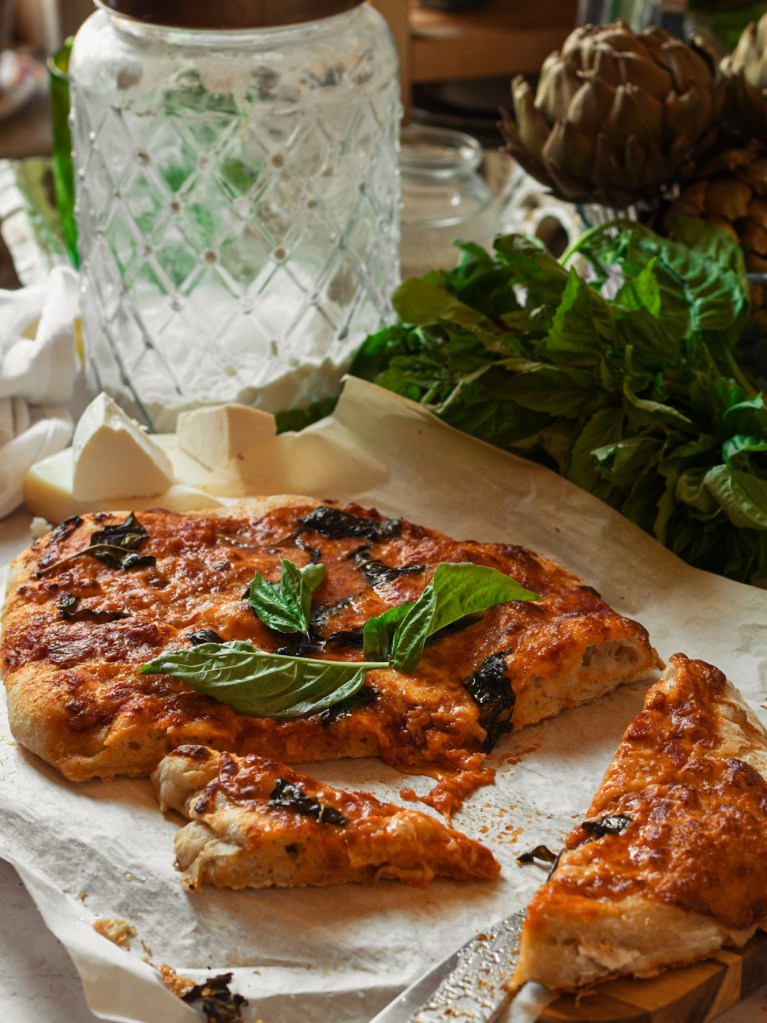
Bake for 10-25 minutes depending on your oven.
Tips for baking in a standard kitchen oven, especially if you’re in an apartment, renting or haven’t had the opportunity to upgrade to a new oven.
Start your pizza on the bottom rack, set a timer for 6 minutes. Move Pizza to top rack for the remainder of cooking time.
Is it done yet?
Carefully check the bottom of your pizza, is it golden brown?
Does it make a hollow thud when you flick it?
It is done. Allow to cool before slicing.

